Find and Add documents

Print this Topic  Previous Topic Home Topic Next Topic
You are here: Add a document >Find and Add documents
Expand All   Collapse All

 
You can search for documents on your disk and add them to Sohodox by using the Find and Add option.


To Find Documents and Add them to Sohodox:

1.In Sohodox, click the Add from disk drop down and select the Find and Add option on the Ribbon bar. The Find and Add Files window will be launched.
 
2.Click this button besides the Look in box of the Find and Add Files window, to select the folder in which you want to search the documents. This will bring up the Browse for folder window. You can also type in the location of the folder in the Look in box.
3.Select the folder and click OK. The folders location will be displayed in the Look in box.
4.Type all or part of the file name in the Search for box to search that file in the selected folder. The name can contain wildcard characters (* and ?).
Click here to know more about using wildcard characters

A wildcard character is a keyboard character such as an asterisk (*) or a question mark (?) that you can use to represent one or more real characters when you are searching for files or folders. Wildcard characters are often used in place of one or more characters when you don't know what the real character is or you don't want to type the entire name.

Asterisk (*)
You can use the asterisk as a substitute for zero or more characters. If you're looking for a file that you know starts with gloss but you can't remember the rest of the file name, type the following:

gloss*

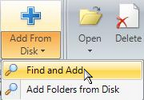
The Find and Add window will locate all files of any file type that begin with the word gloss including Glossary.txt, Glossary.doc, and Glossy.doc.

To narrow the search to a specific type of file, type:

gloss*.doc

In this case, the Find and Add window will find all files that begin with gloss but have the file extension .doc, such as Glossary.doc and Glossy.doc.

Question Mark (?)
You can use the question mark as a substitute for a single character in a name. For example, if you typed gloss?.doc, the Find and Add window would locate the file Glossy.doc or Gloss1.doc but not Glossary.doc.

5.Check the Include Sub-Folders option to search for files within sub- folders (if any), of the selected folder.
6.Now, click the Search button. The files that match your search criteria will be listed in the List of files to be added pane.
7.Uncheck the Clear previous search results option if you want the list of files returned by the new search to be added to the list of the files returned by a previous search.
8.Click the Browse and Add button to select any additional files that were not found in the search(optional). The selected files will be listed in the List of files to be added pane.
9.In the List of files to be added pane check the files that you want to add and uncheck those files that you do not want to add to the Sohodox DB.
a)Click the Select All button to select all the files in the List of files to be added pane.
b)Click the Select None option to uncheck all the files in the List of files to be added pane.
10.Check the Use exceptions option to use exceptions (optional).
 
You can use Exceptions to exclude or include particular file or file types to the Sohodox DB. For e.g. If the folder that you have selected contains pdf, doc, tiff and jpeg files. However, if you only want to add .DOC files, then you can use an exception which will add the .DOC files and exclude the remaining files.
Click here to learn to use Exceptions
a)Click the Exceptions button to add exceptions. The Exceptions window will be launched.
b)Select the Do not add these files tab to specify the file or file type you want to exclude and then click the Add button. For e.g. if you do not want to add .PDF files to the List of files to be added pane, then type *.PDF in the text box and click the Add button to add it to the list.
c)Select the Add only these files tab to specify the file or file type you want to include and then click the Add button. For e.g. if you only want to add .DOC files to the List of files to be added pane, then type *.DOC in the text box and click the Add button to add it to the list.
d)To remove an Exception from the list, select it and click the Remove button.
e)Click OK button to close the Exceptions window.
11.Specify the location to add the selected files in the Destination tab (optional). You can also use a Destination Profile from the Select a Destination Profile drop down to specify the location to add the selected files.
Follow these steps to specify the Destination for the selected files
a)Click this button besides the Choose a Folder box to select a folder to add the selected files.
The Folder Selection window will be launched.
i.Select a folder from the list. You can use the Search box to search a folder.
ii.Click the OK button to select the folder. The selected folder will now be displayed in the Choose a Folder box.
b)You can add Tags (keywords) to the selected files in the Attach Tags option. You can type as many tags you want by using a semi-colon to separate them.
c)Set the Document Type of the document, from the Set a Document Type drop down. For e.g. Set the Document Type to 'Invoice' if the selected files are invoices.
12.You can also link the selected files with other documents by using the Links tab.
Use the Link to existing Documents box to link the selected files to existing documents
a)Click this button besides the Link to existing documents box. The Look Up window will be launched.
b)Select Documents option from the Look in box and type all or part of the file name in the Look for box.
c)Now, click the Find button. The documents that contain the word that you have entered in the Look for box will be displayed in the Search Result list.
d)Select the document that you want to link with the selected files and add it to the Selected Files list.
e)Click the OK button to link these documents.
Note: You can add more links by clicking this button and you can break a link by clicking this button.
Also see, Link one Document with another Document
13.Now, click the Add button to add the selected documents to the Sohodox DB.
 
Note: Once the documents are added, you will get a confirmation message box asking you whether you want to delete the added files from the original location (on the disk). If you want to delete the added documents then click the Yes button if not then click No.
14.Click the Close button to close the Find and Add window.


You can add your entire folders structure along with the documents on your disk that you use to organize your documents. For more info see, Add the existing folder structure along with files from disk
By default 50 documents will be displayed in the List View pane. If you have added more than 50 documents they will moved to the next page. To view the documents displayed on the next page use the Next button below the List View pane.
By default documents added to Sohodox can only be viewed and modified by the owner/creator i.e. other Sohodox users will not be able to view documents added by you unless you share that document.
You will be the Owner of the documents that you have added.
 

Related Topics
Find document quickly
Share documents
Enter Indexing Information for a Document
Drag and drop text from a document


Page URL: http://www.sohodox.com/docs/help/index.htm?find_and_add_documents.htm